制約を理解する
Flutter を学習している人に、なぜウィジェットがあるのかと尋ねられたとき
とwidth:100幅が100ピクセルではないので、
デフォルトの答えは、そのウィジェットを配置するように指示することです
の内側Center、 右?
そんなことはしないでください。
そうすれば、彼らは何度でも戻ってくるでしょう、
理由を尋ねるFittedBox機能していない、
どうしてColumn溢れてるのか何なのかIntrinsicWidthしていることになっている。
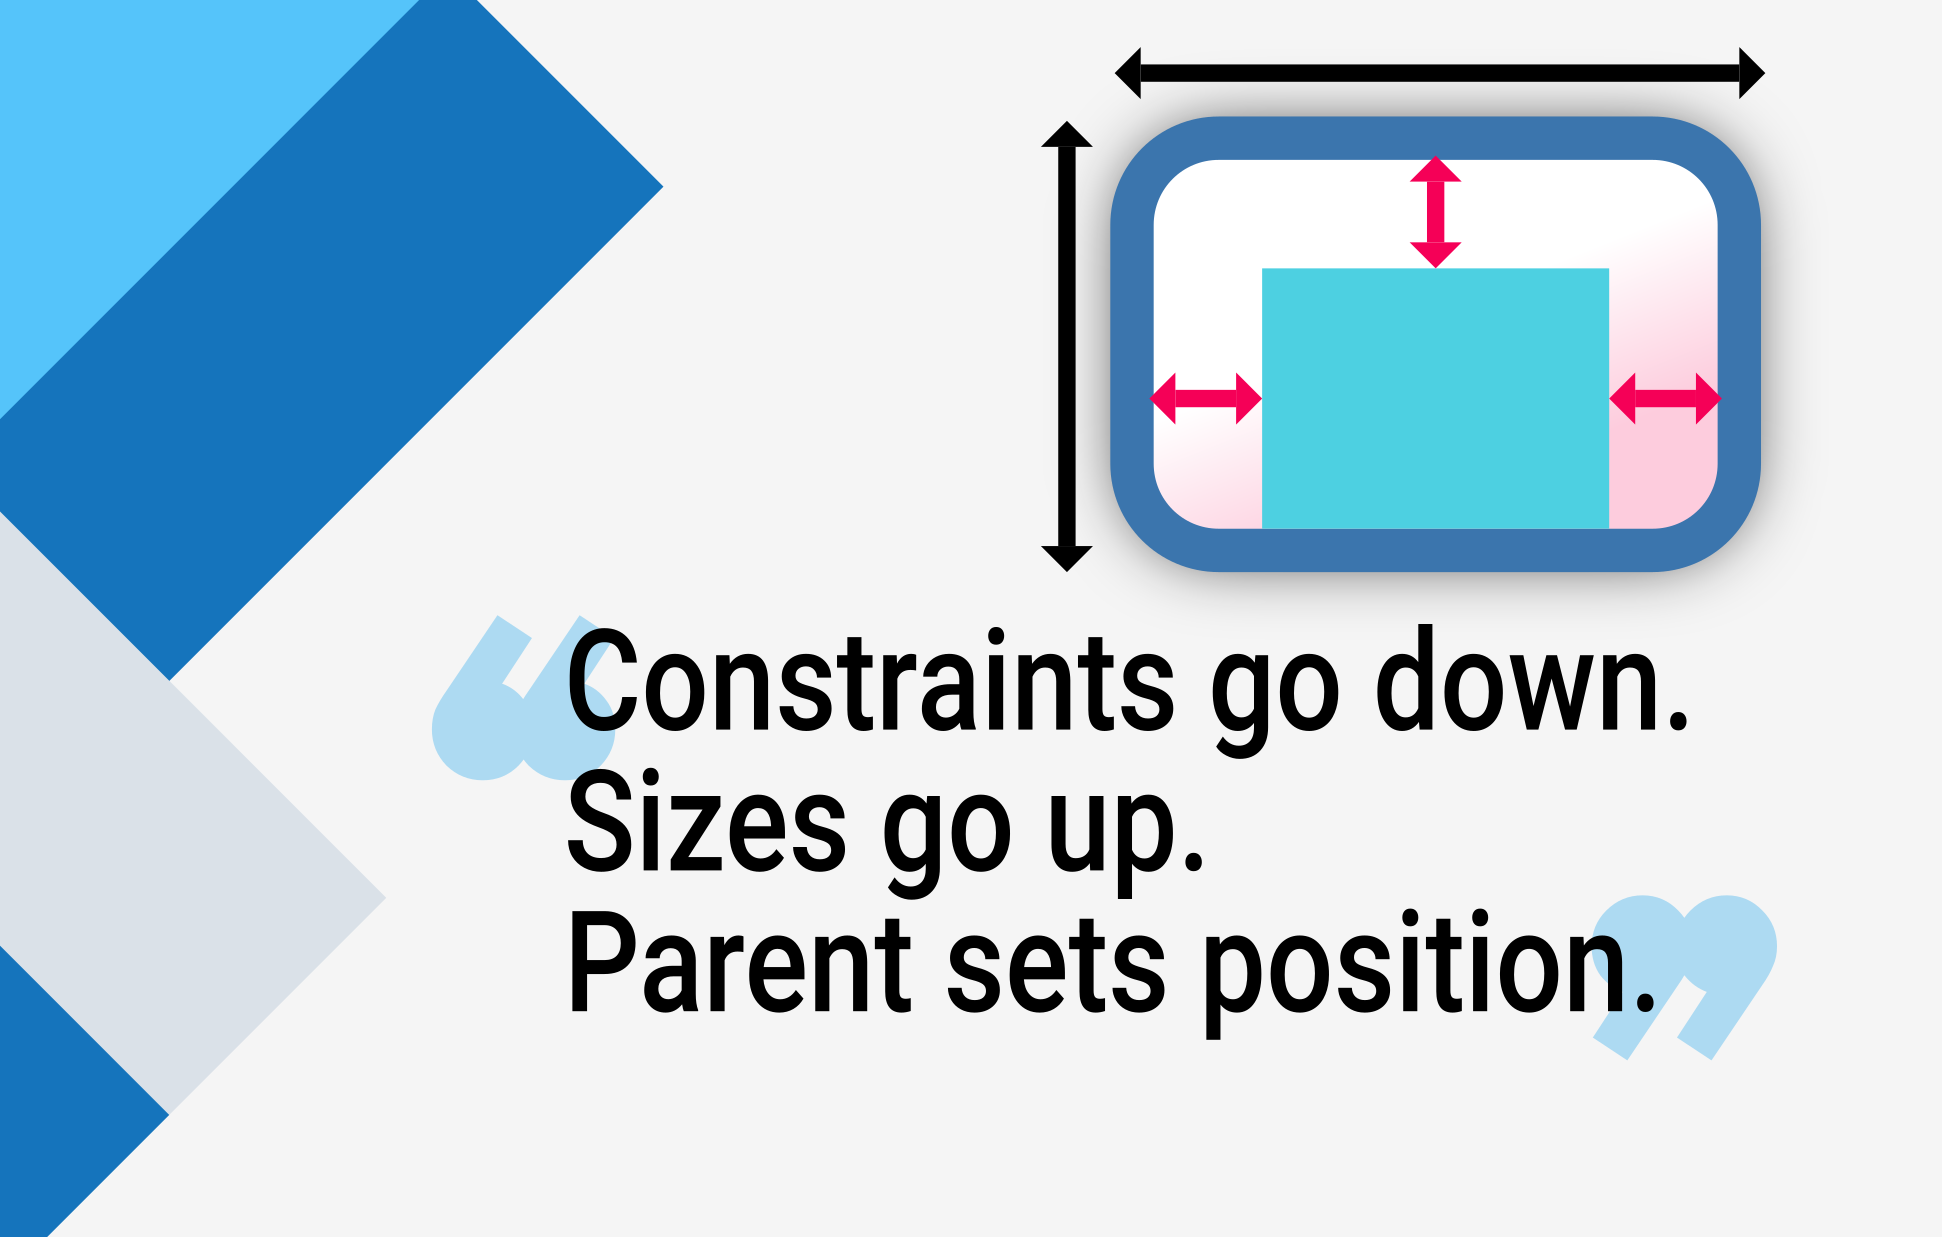
代わりに、まず Flutter レイアウトが大きく異なることを伝えます。 HTML レイアウトから (おそらくそこから来ている)、 そして次のルールを覚えさせます。
Flutterレイアウトは知らないと本当に理解できない このルールは、Flutter 開発者が早い段階で学習する必要があります。
さらに詳細に:
- ウィジェットは独自のウィジェットを取得します制約そのから親。 あ制約は単なる 4 つのダブルのセットです。 幅の最小値と最大値、高さの最小値と最大値。
- 次に、ウィジェットは独自のリストを調べます。子供。 ウィジェットは 1 つずつ、その子に何を伝えるかを伝えます。制約(子供ごとに異なる場合があります)、 次に、子供たちにどのサイズになりたいかを尋ねます。
- 次に、ウィジェットはその位置を決めます。子供(水平方向に
x軸方向と垂直方向y軸)、 一つずつ。 - そして最後に、ウィジェットは親に自分自身のことを伝えます。サイズ(もちろん、元の制約内で)。
たとえば、構成されたウィジェットに列が含まれている場合、 いくつかのパディングがあり、2 つの子をレイアウトしたいと考えています 次のように:
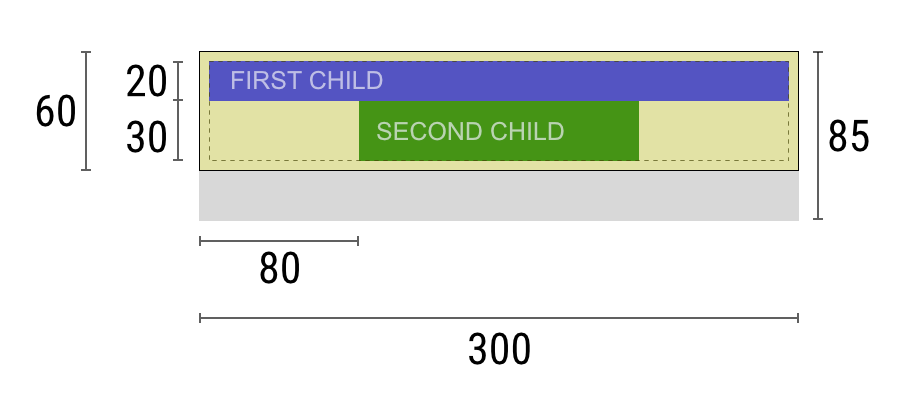
交渉は次のように進みます。
ウィジェット: 「親御さん、私の制約は何ですか?」
親: 「あなたは出身に違いありません80に300ピクセル幅、
と30に85高い。"
ウィジェット:「うーん、欲しいから」5パディングのピクセル、
そうすれば、私の子供たちはせいぜい290幅のピクセル数
と75高さのピクセル。」
ウィジェット:「ねえ、最初の子、あなたは出身ですよね?」0に290ピクセル幅、そして0に75高い。"
第一子:「わかりました、それでは私はそうなりたいです290ピクセル幅、
と20ピクセルの高さです。」
ウィジェット:「うーん、2人目は下に置きたいので、
最初の 1 つ、これで残るのは55高さのピクセル数
私の第二子です。」
ウィジェット:「ねえ、2番目の子、あなたは出身ですよね?」0に290幅、
と0に55高い。"
第二子:「わかりました、そうなりたいです140ピクセル幅、
と30ピクセルの高さです。」
ウィジェット: "結構。私の最初の子供には地位がありますx: 5とy: 5、
そして私の2人目の子供はx: 80とy: 25」
ウィジェット: 「親御さん、私のサイズは次のサイズになると決めました。」300ピクセル幅、そして60ピクセルの高さです。」
制限事項
上記のレイアウトルールの結果、 Flutter のレイアウト エンジンには、いくつかの重要な制限があります。
-
ウィジェットは、次の範囲内でのみ独自のサイズを決定できます。 親によって与えられた制約。 これは通常ウィジェットを意味します何も持つことができない 欲しいサイズ。
-
ウィジェット自分の立場が分からず決められない 画面の中のを決定するのはウィジェットの親であるため、 ウィジェットの位置。
-
親の大きさと位置から、今度は、 自分の親にも依存するので、それは不可能です ウィジェットのサイズと位置を正確に定義します 木全体を考慮せずに。
-
お子様が親と異なるサイズを希望する場合、 親は調整するのに十分な情報を持っていないため、 その場合、子供のサイズは無視される可能性があります。配置を定義するときは具体的にしてください。
例
インタラクティブな体験をするには、次の DartPad を使用します。 番号の付いた水平スクロール バーを使用して、次の項目を切り替えます。 29 の異なる例。
import 'package:flutter/material.dart';
void main() => runApp(const HomePage());
const red = Colors.red;
const green = Colors.green;
const blue = Colors.blue;
const big = TextStyle(fontSize: 30);
//////////////////////////////////////////////////
class HomePage extends StatelessWidget {
const HomePage({super.key});
@override
Widget build(BuildContext context) {
return const FlutterLayoutArticle([
Example1(),
Example2(),
Example3(),
Example4(),
Example5(),
Example6(),
Example7(),
Example8(),
Example9(),
Example10(),
Example11(),
Example12(),
Example13(),
Example14(),
Example15(),
Example16(),
Example17(),
Example18(),
Example19(),
Example20(),
Example21(),
Example22(),
Example23(),
Example24(),
Example25(),
Example26(),
Example27(),
Example28(),
Example29(),
]);
}
}
//////////////////////////////////////////////////
abstract class Example extends StatelessWidget {
const Example({super.key});
String get code;
String get explanation;
}
//////////////////////////////////////////////////
class FlutterLayoutArticle extends StatefulWidget {
const FlutterLayoutArticle(
this.examples, {
super.key,
});
final List<Example> examples;
@override
State<FlutterLayoutArticle> createState() => _FlutterLayoutArticleState();
}
//////////////////////////////////////////////////
class _FlutterLayoutArticleState extends State<FlutterLayoutArticle> {
late int count;
late Widget example;
late String code;
late String explanation;
@override
void initState() {
count = 1;
code = const Example1().code;
explanation = const Example1().explanation;
super.initState();
}
@override
void didUpdateWidget(FlutterLayoutArticle oldWidget) {
super.didUpdateWidget(oldWidget);
var example = widget.examples[count - 1];
code = example.code;
explanation = example.explanation;
}
@override
Widget build(BuildContext context) {
return MaterialApp(
debugShowCheckedModeBanner: false,
title: 'Flutter Layout Article',
home: SafeArea(
child: Material(
color: Colors.black,
child: FittedBox(
child: Container(
width: 400,
height: 670,
color: const Color(0xFFCCCCCC),
child: Column(
crossAxisAlignment: CrossAxisAlignment.center,
children: [
Expanded(
child: ConstrainedBox(
constraints: const BoxConstraints.tightFor(
width: double.infinity, height: double.infinity),
child: widget.examples[count - 1])),
Container(
height: 50,
width: double.infinity,
color: Colors.black,
child: SingleChildScrollView(
scrollDirection: Axis.horizontal,
child: Row(
mainAxisSize: MainAxisSize.min,
children: [
for (int i = 0; i < widget.examples.length; i++)
Container(
width: 58,
padding:
const EdgeInsets.only(left: 4, right: 4),
child: button(i + 1),
),
],
),
),
),
Container(
height: 273,
color: Colors.grey[50],
child: Scrollbar(
child: SingleChildScrollView(
key: ValueKey(count),
child: Padding(
padding: const EdgeInsets.all(10),
child: Column(
children: [
Center(child: Text(code)),
const SizedBox(height: 15),
Text(
explanation,
style: TextStyle(
color: Colors.blue[900],
fontStyle: FontStyle.italic),
),
],
),
),
),
),
),
],
),
),
),
),
),
);
}
Widget button(int exampleNumber) {
return Button(
key: ValueKey('button$exampleNumber'),
isSelected: count == exampleNumber,
exampleNumber: exampleNumber,
onPressed: () {
showExample(
exampleNumber,
widget.examples[exampleNumber - 1].code,
widget.examples[exampleNumber - 1].explanation,
);
},
);
}
void showExample(int exampleNumber, String code, String explanation) {
setState(() {
count = exampleNumber;
this.code = code;
this.explanation = explanation;
});
}
}
//////////////////////////////////////////////////
class Button extends StatelessWidget {
final bool isSelected;
final int exampleNumber;
final VoidCallback onPressed;
const Button({
super.key,
required this.isSelected,
required this.exampleNumber,
required this.onPressed,
});
@override
Widget build(BuildContext context) {
return TextButton(
style: TextButton.styleFrom(
foregroundColor: Colors.white,
backgroundColor: isSelected ? Colors.grey : Colors.grey[800],
),
child: Text(exampleNumber.toString()),
onPressed: () {
Scrollable.ensureVisible(
context,
duration: const Duration(milliseconds: 350),
curve: Curves.easeOut,
alignment: 0.5,
);
onPressed();
},
);
}
}
//////////////////////////////////////////////////
class Example1 extends Example {
const Example1({super.key});
@override
final code = 'Container(color: red)';
@override
final explanation = 'The screen is the parent of the Container, '
'and it forces the Container to be exactly the same size as the screen.'
'\n\n'
'So the Container fills the screen and paints it red.';
@override
Widget build(BuildContext context) {
return Container(color: red);
}
}
//////////////////////////////////////////////////
class Example2 extends Example {
const Example2({super.key});
@override
final code = 'Container(width: 100, height: 100, color: red)';
@override
final String explanation =
'The red Container wants to be 100x100, but it can\'t, '
'because the screen forces it to be exactly the same size as the screen.'
'\n\n'
'So the Container fills the screen.';
@override
Widget build(BuildContext context) {
return Container(width: 100, height: 100, color: red);
}
}
//////////////////////////////////////////////////
class Example3 extends Example {
const Example3({super.key});
@override
final code = 'Center(\n'
' child: Container(width: 100, height: 100, color: red))';
@override
final String explanation =
'The screen forces the Center to be exactly the same size as the screen, '
'so the Center fills the screen.'
'\n\n'
'The Center tells the Container that it can be any size it wants, but not bigger than the screen.'
'Now the Container can indeed be 100x100.';
@override
Widget build(BuildContext context) {
return Center(
child: Container(width: 100, height: 100, color: red),
);
}
}
//////////////////////////////////////////////////
class Example4 extends Example {
const Example4({super.key});
@override
final code = 'Align(\n'
' alignment: Alignment.bottomRight,\n'
' child: Container(width: 100, height: 100, color: red))';
@override
final String explanation =
'This is different from the previous example in that it uses Align instead of Center.'
'\n\n'
'Align also tells the Container that it can be any size it wants, but if there is empty space it won\'t center the Container. '
'Instead, it aligns the Container to the bottom-right of the available space.';
@override
Widget build(BuildContext context) {
return Align(
alignment: Alignment.bottomRight,
child: Container(width: 100, height: 100, color: red),
);
}
}
//////////////////////////////////////////////////
class Example5 extends Example {
const Example5({super.key});
@override
final code = 'Center(\n'
' child: Container(\n'
' color: red,\n'
' width: double.infinity,\n'
' height: double.infinity))';
@override
final String explanation =
'The screen forces the Center to be exactly the same size as the screen, '
'so the Center fills the screen.'
'\n\n'
'The Center tells the Container that it can be any size it wants, but not bigger than the screen.'
'The Container wants to be of infinite size, but since it can\'t be bigger than the screen, it just fills the screen.';
@override
Widget build(BuildContext context) {
return Center(
child: Container(
width: double.infinity, height: double.infinity, color: red),
);
}
}
//////////////////////////////////////////////////
class Example6 extends Example {
const Example6({super.key});
@override
final code = 'Center(child: Container(color: red))';
@override
final String explanation =
'The screen forces the Center to be exactly the same size as the screen, '
'so the Center fills the screen.'
'\n\n'
'The Center tells the Container that it can be any size it wants, but not bigger than the screen.'
'\n\n'
'Since the Container has no child and no fixed size, it decides it wants to be as big as possible, so it fills the whole screen.'
'\n\n'
'But why does the Container decide that? '
'Simply because that\'s a design decision by those who created the Container widget. '
'It could have been created differently, and you have to read the Container documentation to understand how it behaves, depending on the circumstances. ';
@override
Widget build(BuildContext context) {
return Center(
child: Container(color: red),
);
}
}
//////////////////////////////////////////////////
class Example7 extends Example {
const Example7({super.key});
@override
final code = 'Center(\n'
' child: Container(color: red\n'
' child: Container(color: green, width: 30, height: 30)))';
@override
final String explanation =
'The screen forces the Center to be exactly the same size as the screen, '
'so the Center fills the screen.'
'\n\n'
'The Center tells the red Container that it can be any size it wants, but not bigger than the screen.'
'Since the red Container has no size but has a child, it decides it wants to be the same size as its child.'
'\n\n'
'The red Container tells its child that it can be any size it wants, but not bigger than the screen.'
'\n\n'
'The child is a green Container that wants to be 30x30.'
'\n\n'
'Since the red `Container` has no size but has a child, it decides it wants to be the same size as its child. '
'The red color isn\'t visible, since the green Container entirely covers all of the red Container.';
@override
Widget build(BuildContext context) {
return Center(
child: Container(
color: red,
child: Container(color: green, width: 30, height: 30),
),
);
}
}
//////////////////////////////////////////////////
class Example8 extends Example {
const Example8({super.key});
@override
final code = 'Center(\n'
' child: Container(color: red\n'
' padding: const EdgeInsets.all(20),\n'
' child: Container(color: green, width: 30, height: 30)))';
@override
final String explanation =
'The red Container sizes itself to its children size, but it takes its own padding into consideration. '
'So it is also 30x30 plus padding. '
'The red color is visible because of the padding, and the green Container has the same size as in the previous example.';
@override
Widget build(BuildContext context) {
return Center(
child: Container(
padding: const EdgeInsets.all(20),
color: red,
child: Container(color: green, width: 30, height: 30),
),
);
}
}
//////////////////////////////////////////////////
class Example9 extends Example {
const Example9({super.key});
@override
final code = 'ConstrainedBox(\n'
' constraints: BoxConstraints(\n'
' minWidth: 70, minHeight: 70,\n'
' maxWidth: 150, maxHeight: 150),\n'
' child: Container(color: red, width: 10, height: 10)))';
@override
final String explanation =
'You might guess that the Container has to be between 70 and 150 pixels, but you would be wrong. '
'The ConstrainedBox only imposes ADDITIONAL constraints from those it receives from its parent.'
'\n\n'
'Here, the screen forces the ConstrainedBox to be exactly the same size as the screen, '
'so it tells its child Container to also assume the size of the screen, '
'thus ignoring its \'constraints\' parameter.';
@override
Widget build(BuildContext context) {
return ConstrainedBox(
constraints: const BoxConstraints(
minWidth: 70,
minHeight: 70,
maxWidth: 150,
maxHeight: 150,
),
child: Container(color: red, width: 10, height: 10),
);
}
}
//////////////////////////////////////////////////
class Example10 extends Example {
const Example10({super.key});
@override
final code = 'Center(\n'
' child: ConstrainedBox(\n'
' constraints: BoxConstraints(\n'
' minWidth: 70, minHeight: 70,\n'
' maxWidth: 150, maxHeight: 150),\n'
' child: Container(color: red, width: 10, height: 10))))';
@override
final String explanation =
'Now, Center allows ConstrainedBox to be any size up to the screen size.'
'\n\n'
'The ConstrainedBox imposes ADDITIONAL constraints from its \'constraints\' parameter onto its child.'
'\n\n'
'The Container must be between 70 and 150 pixels. It wants to have 10 pixels, so it will end up having 70 (the MINIMUM).';
@override
Widget build(BuildContext context) {
return Center(
child: ConstrainedBox(
constraints: const BoxConstraints(
minWidth: 70,
minHeight: 70,
maxWidth: 150,
maxHeight: 150,
),
child: Container(color: red, width: 10, height: 10),
),
);
}
}
//////////////////////////////////////////////////
class Example11 extends Example {
const Example11({super.key});
@override
final code = 'Center(\n'
' child: ConstrainedBox(\n'
' constraints: BoxConstraints(\n'
' minWidth: 70, minHeight: 70,\n'
' maxWidth: 150, maxHeight: 150),\n'
' child: Container(color: red, width: 1000, height: 1000))))';
@override
final String explanation =
'Center allows ConstrainedBox to be any size up to the screen size.'
'The ConstrainedBox imposes ADDITIONAL constraints from its \'constraints\' parameter onto its child'
'\n\n'
'The Container must be between 70 and 150 pixels. It wants to have 1000 pixels, so it ends up having 150 (the MAXIMUM).';
@override
Widget build(BuildContext context) {
return Center(
child: ConstrainedBox(
constraints: const BoxConstraints(
minWidth: 70,
minHeight: 70,
maxWidth: 150,
maxHeight: 150,
),
child: Container(color: red, width: 1000, height: 1000),
),
);
}
}
//////////////////////////////////////////////////
class Example12 extends Example {
const Example12({super.key});
@override
final code = 'Center(\n'
' child: ConstrainedBox(\n'
' constraints: BoxConstraints(\n'
' minWidth: 70, minHeight: 70,\n'
' maxWidth: 150, maxHeight: 150),\n'
' child: Container(color: red, width: 100, height: 100))))';
@override
final String explanation =
'Center allows ConstrainedBox to be any size up to the screen size.'
'ConstrainedBox imposes ADDITIONAL constraints from its \'constraints\' parameter onto its child.'
'\n\n'
'The Container must be between 70 and 150 pixels. It wants to have 100 pixels, and that\'s the size it has, since that\'s between 70 and 150.';
@override
Widget build(BuildContext context) {
return Center(
child: ConstrainedBox(
constraints: const BoxConstraints(
minWidth: 70,
minHeight: 70,
maxWidth: 150,
maxHeight: 150,
),
child: Container(color: red, width: 100, height: 100),
),
);
}
}
//////////////////////////////////////////////////
class Example13 extends Example {
const Example13({super.key});
@override
final code = 'UnconstrainedBox(\n'
' child: Container(color: red, width: 20, height: 50));';
@override
final String explanation =
'The screen forces the UnconstrainedBox to be exactly the same size as the screen.'
'However, the UnconstrainedBox lets its child Container be any size it wants.';
@override
Widget build(BuildContext context) {
return UnconstrainedBox(
child: Container(color: red, width: 20, height: 50),
);
}
}
//////////////////////////////////////////////////
class Example14 extends Example {
const Example14({super.key});
@override
final code = 'UnconstrainedBox(\n'
' child: Container(color: red, width: 4000, height: 50));';
@override
final String explanation =
'The screen forces the UnconstrainedBox to be exactly the same size as the screen, '
'and UnconstrainedBox lets its child Container be any size it wants.'
'\n\n'
'Unfortunately, in this case the Container has 4000 pixels of width and is too big to fit in the UnconstrainedBox, '
'so the UnconstrainedBox displays the much dreaded "overflow warning".';
@override
Widget build(BuildContext context) {
return UnconstrainedBox(
child: Container(color: red, width: 4000, height: 50),
);
}
}
//////////////////////////////////////////////////
class Example15 extends Example {
const Example15({super.key});
@override
final code = 'OverflowBox(\n'
' minWidth: 0,'
' minHeight: 0,'
' maxWidth: double.infinity,'
' maxHeight: double.infinity,'
' child: Container(color: red, width: 4000, height: 50));';
@override
final String explanation =
'The screen forces the OverflowBox to be exactly the same size as the screen, '
'and OverflowBox lets its child Container be any size it wants.'
'\n\n'
'OverflowBox is similar to UnconstrainedBox, and the difference is that it won\'t display any warnings if the child doesn\'t fit the space.'
'\n\n'
'In this case the Container is 4000 pixels wide, and is too big to fit in the OverflowBox, '
'but the OverflowBox simply shows as much as it can, with no warnings given.';
@override
Widget build(BuildContext context) {
return OverflowBox(
minWidth: 0,
minHeight: 0,
maxWidth: double.infinity,
maxHeight: double.infinity,
child: Container(color: red, width: 4000, height: 50),
);
}
}
//////////////////////////////////////////////////
class Example16 extends Example {
const Example16({super.key});
@override
final code = 'UnconstrainedBox(\n'
' child: Container(color: Colors.red, width: double.infinity, height: 100));';
@override
final String explanation =
'This won\'t render anything, and you\'ll see an error in the console.'
'\n\n'
'The UnconstrainedBox lets its child be any size it wants, '
'however its child is a Container with infinite size.'
'\n\n'
'Flutter can\'t render infinite sizes, so it throws an error with the following message: '
'"BoxConstraints forces an infinite width."';
@override
Widget build(BuildContext context) {
return UnconstrainedBox(
child: Container(color: Colors.red, width: double.infinity, height: 100),
);
}
}
//////////////////////////////////////////////////
class Example17 extends Example {
const Example17({super.key});
@override
final code = 'UnconstrainedBox(\n'
' child: LimitedBox(maxWidth: 100,\n'
' child: Container(color: Colors.red,\n'
' width: double.infinity, height: 100));';
@override
final String explanation = 'Here you won\'t get an error anymore, '
'because when the LimitedBox is given an infinite size by the UnconstrainedBox, '
'it passes a maximum width of 100 down to its child.'
'\n\n'
'If you swap the UnconstrainedBox for a Center widget, '
'the LimitedBox won\'t apply its limit anymore (since its limit is only applied when it gets infinite constraints), '
'and the width of the Container is allowed to grow past 100.'
'\n\n'
'This explains the difference between a LimitedBox and a ConstrainedBox.';
@override
Widget build(BuildContext context) {
return UnconstrainedBox(
child: LimitedBox(
maxWidth: 100,
child: Container(
color: Colors.red,
width: double.infinity,
height: 100,
),
),
);
}
}
//////////////////////////////////////////////////
class Example18 extends Example {
const Example18({super.key});
@override
final code = 'FittedBox(\n'
' child: Text(\'Some Example Text.\'));';
@override
final String explanation =
'The screen forces the FittedBox to be exactly the same size as the screen.'
'The Text has some natural width (also called its intrinsic width) that depends on the amount of text, its font size, and so on.'
'\n\n'
'The FittedBox lets the Text be any size it wants, '
'but after the Text tells its size to the FittedBox, '
'the FittedBox scales the Text until it fills all of the available width.';
@override
Widget build(BuildContext context) {
return const FittedBox(
child: Text('Some Example Text.'),
);
}
}
//////////////////////////////////////////////////
class Example19 extends Example {
const Example19({super.key});
@override
final code = 'Center(\n'
' child: FittedBox(\n'
' child: Text(\'Some Example Text.\')));';
@override
final String explanation =
'But what happens if you put the FittedBox inside of a Center widget? '
'The Center lets the FittedBox be any size it wants, up to the screen size.'
'\n\n'
'The FittedBox then sizes itself to the Text, and lets the Text be any size it wants.'
'\n\n'
'Since both FittedBox and the Text have the same size, no scaling happens.';
@override
Widget build(BuildContext context) {
return const Center(
child: FittedBox(
child: Text('Some Example Text.'),
),
);
}
}
////////////////////////////////////////////////////
class Example20 extends Example {
const Example20({super.key});
@override
final code = 'Center(\n'
' child: FittedBox(\n'
' child: Text(\'…\')));';
@override
final String explanation =
'However, what happens if FittedBox is inside of a Center widget, but the Text is too large to fit the screen?'
'\n\n'
'FittedBox tries to size itself to the Text, but it can\'t be bigger than the screen. '
'It then assumes the screen size, and resizes Text so that it fits the screen, too.';
@override
Widget build(BuildContext context) {
return const Center(
child: FittedBox(
child: Text(
'This is some very very very large text that is too big to fit a regular screen in a single line.'),
),
);
}
}
//////////////////////////////////////////////////
class Example21 extends Example {
const Example21({super.key});
@override
final code = 'Center(\n'
' child: Text(\'…\'));';
@override
final String explanation = 'If, however, you remove the FittedBox, '
'the Text gets its maximum width from the screen, '
'and breaks the line so that it fits the screen.';
@override
Widget build(BuildContext context) {
return const Center(
child: Text(
'This is some very very very large text that is too big to fit a regular screen in a single line.'),
);
}
}
//////////////////////////////////////////////////
class Example22 extends Example {
const Example22({super.key});
@override
final code = 'FittedBox(\n'
' child: Container(\n'
' height: 20, width: double.infinity));';
@override
final String explanation =
'FittedBox can only scale a widget that is BOUNDED (has non-infinite width and height).'
'Otherwise, it won\'t render anything, and you\'ll see an error in the console.';
@override
Widget build(BuildContext context) {
return FittedBox(
child: Container(
height: 20,
width: double.infinity,
color: Colors.red,
),
);
}
}
//////////////////////////////////////////////////
class Example23 extends Example {
const Example23({super.key});
@override
final code = 'Row(children:[\n'
' Container(color: red, child: Text(\'Hello!\'))\n'
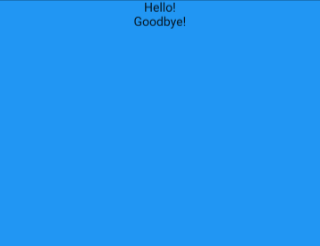
' Container(color: green, child: Text(\'Goodbye!\'))]';
@override
final String explanation =
'The screen forces the Row to be exactly the same size as the screen.'
'\n\n'
'Just like an UnconstrainedBox, the Row won\'t impose any constraints onto its children, '
'and instead lets them be any size they want.'
'\n\n'
'The Row then puts them side-by-side, and any extra space remains empty.';
@override
Widget build(BuildContext context) {
return Row(
children: [
Container(color: red, child: const Text('Hello!', style: big)),
Container(color: green, child: const Text('Goodbye!', style: big)),
],
);
}
}
//////////////////////////////////////////////////
class Example24 extends Example {
const Example24({super.key});
@override
final code = 'Row(children:[\n'
' Container(color: red, child: Text(\'…\'))\n'
' Container(color: green, child: Text(\'Goodbye!\'))]';
@override
final String explanation =
'Since the Row won\'t impose any constraints onto its children, '
'it\'s quite possible that the children might be too big to fit the available width of the Row.'
'In this case, just like an UnconstrainedBox, the Row displays the "overflow warning".';
@override
Widget build(BuildContext context) {
return Row(
children: [
Container(
color: red,
child: const Text(
'This is a very long text that '
'won\'t fit the line.',
style: big,
),
),
Container(color: green, child: const Text('Goodbye!', style: big)),
],
);
}
}
//////////////////////////////////////////////////
class Example25 extends Example {
const Example25({super.key});
@override
final code = 'Row(children:[\n'
' Expanded(\n'
' child: Container(color: red, child: Text(\'…\')))\n'
' Container(color: green, child: Text(\'Goodbye!\'))]';
@override
final String explanation =
'When a Row\'s child is wrapped in an Expanded widget, the Row won\'t let this child define its own width anymore.'
'\n\n'
'Instead, it defines the Expanded width according to the other children, and only then the Expanded widget forces the original child to have the Expanded\'s width.'
'\n\n'
'In other words, once you use Expanded, the original child\'s width becomes irrelevant, and is ignored.';
@override
Widget build(BuildContext context) {
return Row(
children: [
Expanded(
child: Center(
child: Container(
color: red,
child: const Text(
'This is a very long text that won\'t fit the line.',
style: big,
),
),
),
),
Container(color: green, child: const Text('Goodbye!', style: big)),
],
);
}
}
//////////////////////////////////////////////////
class Example26 extends Example {
const Example26({super.key});
@override
final code = 'Row(children:[\n'
' Expanded(\n'
' child: Container(color: red, child: Text(\'…\')))\n'
' Expanded(\n'
' child: Container(color: green, child: Text(\'Goodbye!\'))]';
@override
final String explanation =
'If all of Row\'s children are wrapped in Expanded widgets, each Expanded has a size proportional to its flex parameter, '
'and only then each Expanded widget forces its child to have the Expanded\'s width.'
'\n\n'
'In other words, Expanded ignores the preffered width of its children.';
@override
Widget build(BuildContext context) {
return Row(
children: [
Expanded(
child: Container(
color: red,
child: const Text(
'This is a very long text that won\'t fit the line.',
style: big,
),
),
),
Expanded(
child: Container(
color: green,
child: const Text(
'Goodbye!',
style: big,
),
),
),
],
);
}
}
//////////////////////////////////////////////////
class Example27 extends Example {
const Example27({super.key});
@override
final code = 'Row(children:[\n'
' Flexible(\n'
' child: Container(color: red, child: Text(\'…\')))\n'
' Flexible(\n'
' child: Container(color: green, child: Text(\'Goodbye!\'))]';
@override
final String explanation =
'The only difference if you use Flexible instead of Expanded, '
'is that Flexible lets its child be SMALLER than the Flexible width, '
'while Expanded forces its child to have the same width of the Expanded.'
'\n\n'
'But both Expanded and Flexible ignore their children\'s width when sizing themselves.'
'\n\n'
'This means that it\'s IMPOSSIBLE to expand Row children proportionally to their sizes. '
'The Row either uses the exact child\'s width, or ignores it completely when you use Expanded or Flexible.';
@override
Widget build(BuildContext context) {
return Row(
children: [
Flexible(
child: Container(
color: red,
child: const Text(
'This is a very long text that won\'t fit the line.',
style: big,
),
),
),
Flexible(
child: Container(
color: green,
child: const Text(
'Goodbye!',
style: big,
),
),
),
],
);
}
}
//////////////////////////////////////////////////
class Example28 extends Example {
const Example28({super.key});
@override
final code = 'Scaffold(\n'
' body: Container(color: blue,\n'
' child: Column(\n'
' children: [\n'
' Text(\'Hello!\'),\n'
' Text(\'Goodbye!\')])))';
@override
final String explanation =
'The screen forces the Scaffold to be exactly the same size as the screen, '
'so the Scaffold fills the screen.'
'\n\n'
'The Scaffold tells the Container that it can be any size it wants, but not bigger than the screen.'
'\n\n'
'When a widget tells its child that it can be smaller than a certain size, '
'we say the widget supplies "loose" constraints to its child. More on that later.';
@override
Widget build(BuildContext context) {
return Scaffold(
body: Container(
color: blue,
child: const Column(
children: [
Text('Hello!'),
Text('Goodbye!'),
],
),
),
);
}
}
//////////////////////////////////////////////////
class Example29 extends Example {
const Example29({super.key});
@override
final code = 'Scaffold(\n'
' body: Container(color: blue,\n'
' child: SizedBox.expand(\n'
' child: Column(\n'
' children: [\n'
' Text(\'Hello!\'),\n'
' Text(\'Goodbye!\')]))))';
@override
final String explanation =
'If you want the Scaffold\'s child to be exactly the same size as the Scaffold itself, '
'you can wrap its child with SizedBox.expand.'
'\n\n'
'When a widget tells its child that it must be of a certain size, '
'we say the widget supplies "tight" constraints to its child. More on that later.';
@override
Widget build(BuildContext context) {
return Scaffold(
body: SizedBox.expand(
child: Container(
color: blue,
child: const Column(
children: [
Text('Hello!'),
Text('Goodbye!'),
],
),
),
),
);
}
}
//////////////////////////////////////////////////必要に応じて、からコードを取得できます。この GitHub リポジトリ。
以下のセクションで例について説明します。
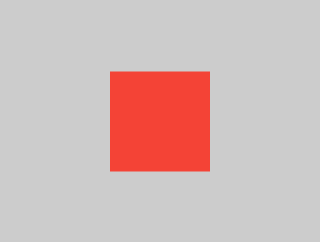
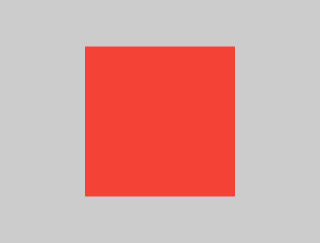
例1

Container(color: red)スクリーンはその親ですContainer、そしてそれ
強制的にContainer画面とまったく同じサイズになるようにします。
それで、Container画面いっぱいに赤く染まります。
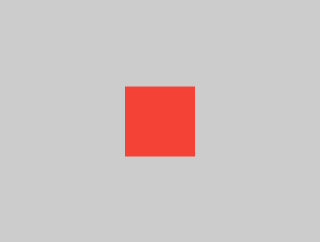
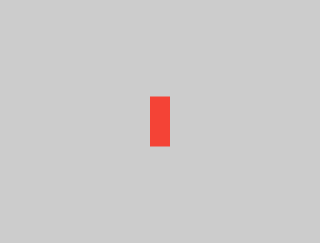
例 2

Container(width: 100, height: 100, color: red)赤いContainer100×100になりたい、
しかし、それはできません。画面が強制しているためです。
画面と全く同じサイズ。
それで、Container画面いっぱいに表示されます。
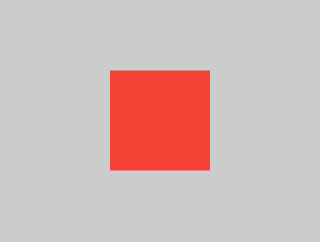
例 3
Center(
  child: Container(width: 100, height: 100, color: red),
)画面は強制的にCenter全く同じ大きさになるように
画面と同様に、Center画面いっぱいに表示されます。
のCenterと言うContainerそれはどんなサイズでもよいということ
欲しいけど画面より大きくない。今、Container確かに 100 × 100 になる可能性があります。
例 4

Align(
  alignment: Alignment.bottomRight,
  child: Container(width: 100, height: 100, color: red),
)これは、使用する点で前の例とは異なります。Alignそれ以外のCenter。
Alignも伝えますContainerそれはどんなサイズでもよいということ
が必要ですが、空きスペースがある場合は中央に配置されません。Container。
代わりに、コンテナを右下に配置します。
利用可能なスペース。
例5

Center(
  child: Container(
      width: double.infinity, height: double.infinity, color: red),
)画面は強制的にCenterまさに
画面と同じサイズなので、7479acc2-4d81-4f1d-bc06-1dfeb5b5602画面いっぱいに表示されます。
のCenterと言うContainer必要なサイズにできるということ、
ただし画面より大きくはありません。のContainerなりたい
サイズは無限ですが、画面より大きくすることはできないため、
画面いっぱいに表示されるだけです。
例6

Center(
  child: Container(color: red),
)画面は強制的にCenterまさに
画面と同じサイズなので、Center画面いっぱいに表示されます。
のCenterと言うContainerそれは何でもあり得るということ
必要なサイズですが、画面より大きくはありません。
以来、Container子がなく、固定サイズもありません。
できるだけ大きくしたいと決めるのですが、
なので画面全体に表示されます。
しかし、なぜ、Containerそれを決めますか?
それは単に、それが設計者による決定だからです。
を作成しましたContainerウィジェット。そうかもしれない
異なる方法で作成されているため、読む必要があります。Containerドキュメンテーションそれがどのように起こるかを理解するために
状況に応じて行動します。
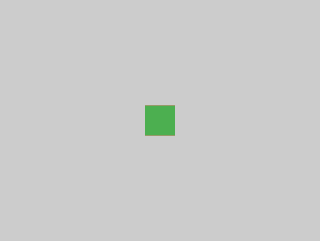
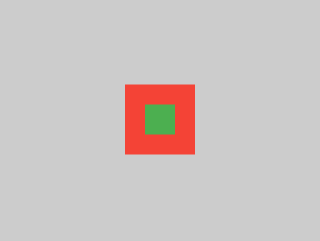
例 7
Center(
  child: Container(
    color: red,
    child: Container(color: green, width: 30, height: 30),
  ),
)画面は強制的にCenter全く同じであること
画面と同じサイズなので、Center画面いっぱいに表示されます。
のCenter赤に告げるContainerどのようなサイズでもよいということ
必要ですが、画面より大きくはなりません。赤以来Containerサイズはありませんが、子供がいます。
それは自分の子供と同じサイズになりたいと決心します。
赤いContainerどのようなサイズでもよいと子供に伝えます
必要ですが、画面より大きくはなりません。
その子は緑色ですContainerしたいのは
30 × 30 であることを考慮します。Containerサイズ自体を
その子のサイズも 30 × 30 です。
緑色なので赤色は見えませんContainer赤みを完全にカバーしますContainer。
例8
Center(
  child: Container(
    padding: const EdgeInsets.all(20),
    color: red,
    child: Container(color: green, width: 30, height: 30),
  ),
)赤いContainer子供のサイズに合わせてサイズを調整し、
ただし、独自のパディングが考慮されます。
つまり、30×30プラスパディングでもあります。
パッドのせいで赤い色が見えますが、
そして緑Containerと同じサイズです
前の例では。
例9

推測できるかもしれませんが、Containerである必要があります
70 から 150 ピクセルの間ですが、それは間違っています。
のConstrainedBox押し付けるだけ追加制約
親から受け取ったものから。
ここで、画面は強制的にConstrainedBoxまさにそうなる
画面と同じサイズなので、子に伝えますContainer画面のサイズも仮定するため、そのサイズは無視されます。constraintsパラメータ。
例 10
Center(
  child: ConstrainedBox(
    constraints: const BoxConstraints(
      minWidth: 70,
      minHeight: 70,
      maxWidth: 150,
      maxHeight: 150,
    ),
    child: Container(color: red, width: 10, height: 10),
  ),
)今、Center許可しますConstrainedBoxまでの任意のサイズにする
画面サイズ。のConstrainedBox課す追加そこからの制約constraintsパラメータをその子に適用します。
コンテナは 70 ~ 150 ピクセルである必要があります。 10ピクセルが必要ですが、 したがって、最終的には 70 (最小値) になります。
例 11
Center(
  child: ConstrainedBox(
    constraints: const BoxConstraints(
      minWidth: 70,
      minHeight: 70,
      maxWidth: 150,
      maxHeight: 150,
    ),
    child: Container(color: red, width: 1000, height: 1000),
  ),
)Center許可しますConstrainedBoxまでの任意のサイズにする
画面サイズ。のConstrainedBox課す追加そこからの制約constraintsパラメータをその子に適用します。
のContainer70 ~ 150 ピクセルにする必要があります。
1000ピクセルが欲しいのですが、
したがって、最終的には 150 (最大値) になります。
例 12
Center(
  child: ConstrainedBox(
    constraints: const BoxConstraints(
      minWidth: 70,
      minHeight: 70,
      maxWidth: 150,
      maxHeight: 150,
    ),
    child: Container(color: red, width: 100, height: 100),
  ),
)Center許可しますConstrainedBoxまでの任意のサイズにする
画面サイズ。のConstrainedBox課す追加そこからの制約constraintsパラメータをその子に適用します。
のContainer70 ~ 150 ピクセルにする必要があります。
100 ピクセルが必要であり、それがそのサイズです。
それは70から150の間だからです。
例 13
UnconstrainedBox(
  child: Container(color: red, width: 20, height: 50),
)画面は強制的にUnconstrainedBoxまさにそうなる
画面と同じサイズ。しかしUnconstrainedBoxその子にさせますContainer任意のサイズにすることができます。
例 14
UnconstrainedBox(
  child: Container(color: red, width: 4000, height: 50),
)画面は強制的にUnconstrainedBoxまさにそうなる
画面と同じサイズで、UnconstrainedBoxその子にさせますContainer任意のサイズにすることができます。
残念ながら、この場合、Containerは
幅4000ピクセルで大きすぎて入りません
のUnconstrainedBox、それで、UnconstrainedBoxディスプレイ
非常に恐ろしい「オーバーフロー警告」。
例 15
OverflowBox(
  minWidth: 0,
  minHeight: 0,
  maxWidth: double.infinity,
  maxHeight: double.infinity,
  child: Container(color: red, width: 4000, height: 50),
)画面は強制的にOverflowBox全く同じであること
画面と同じサイズ、そしてOverflowBoxその子にさせますContainer任意のサイズにすることができます。
OverflowBoxと類似していますUnconstrainedBox;
違いは、警告が表示されないことです
子供がスペースに合わない場合。
この場合、Container幅は 4000 ピクセル、
そして大きすぎて入らないOverflowBox、
しかしOverflowBoxできるだけ多くを表示するだけで、
何の警告も与えられずに。
例 16

UnconstrainedBox(
  child: Container(color: Colors.red, width: double.infinity, height: 100),
)
これでは何も表示されず、コンソールにエラーが表示されます。
のUnconstrainedBox子を任意のサイズにします。
ただし、その子はContainer無限のサイズで。
Flutter は無限のサイズをレンダリングできないため、次のエラーがスローされます。
次のメッセージ:BoxConstraints forces an infinite width.
例 17

UnconstrainedBox(
  child: LimitedBox(
    maxWidth: 100,
    child: Container(
      color: Colors.red,
      width: double.infinity,
      height: 100,
    ),
  ),
)
ここではもうエラーは発生しません。
なぜなら、そのときLimitedBoxが与えられます
による無限のサイズUnconstrainedBox;
最大幅 100 を子に渡します。
交換する場合は、UnconstrainedBoxのためにCenterウィジェット、
のLimitedBoxもう制限は適用されません
(その制限は無限になった場合にのみ適用されるため、
制約)、および幅Container100を超えても成長することができます。
これは、LimitedBoxそしてConstrainedBox。
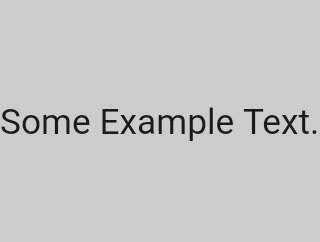
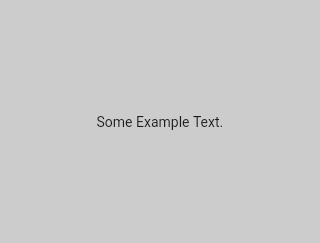
例 18
const FittedBox(
  child: Text('Some Example Text.'),
)画面は強制的にFittedBox全く同じであること
画面と同じサイズ。のTextある程度の自然な幅がある
(固有の幅とも呼ばれます)
テキストの量、フォントサイズなど。
のFittedBoxさせますText希望するサイズであれば、
しかしその後TextそのサイズをFittedBox、
のFittedBoxテキストがすべて埋まるまで拡大縮小します。
利用可能な幅。
例 19
const Center(
  child: FittedBox(
    child: Text('Some Example Text.'),
  ),
)しかし、これを置くとどうなるでしょうかFittedBoxの内側Centerウィジェット?のCenterさせますFittedBox画面サイズまでの任意のサイズにできます。
のFittedBoxその後、自分自身のサイズをText、
そして、Text任意のサイズにすることができます。
両方なのでFittedBoxそしてそのText同じサイズを持っていて、
スケーリングは行われません。
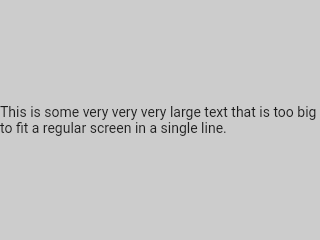
例 20

const Center(
  child: FittedBox(
    child: Text(
        'This is some very very very large text that is too big to fit a regular screen in a single line.'),
  ),
)ただし、次の場合はどうなりますかFittedBoxの中にありますCenterウィジェットですが、Text大きすぎて画面に収まりませんか?
FittedBox自分自身のサイズをそれに合わせようとしますText、
ただし、画面より大きくすることはできません。
次に、画面サイズを想定し、
そしてサイズ変更しますText画面にもフィットするように。
例 21
const Center(
  child: Text(
      'This is some very very very large text that is too big to fit a regular screen in a single line.'),
)ただし、削除した場合は、FittedBox、Text画面から最大幅を取得します。
画面に収まるように行を分割します。
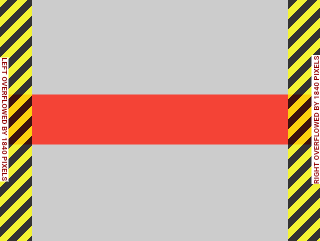
例 22

FittedBox(
  child: Container(
    height: 20,
    width: double.infinity,
    color: Colors.red,
  ),
)FittedBox制限されたウィジェットのみを拡大縮小できます
(幅と高さは無限ではありません)。さもないと、
何も表示されませんが、
コンソールにエラーが表示されます。
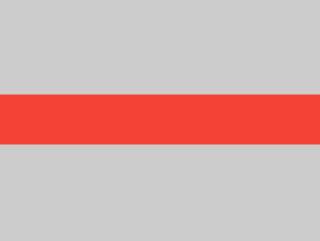
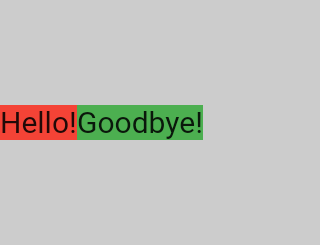
例 23
Row(
  children: [
    Container(color: red, child: const Text('Hello!', style: big)),
    Container(color: green, child: const Text('Goodbye!', style: big)),
  ],
)画面は強制的にRow全く同じ大きさになるように
画面として。
まるでUnconstrainedBox、Rowしません
子に何らかの制約を課し、
その代わりに、任意のサイズにできるようにします。
のRowそれからそれらを並べて置きます、
余分なスペースは空のままになります。
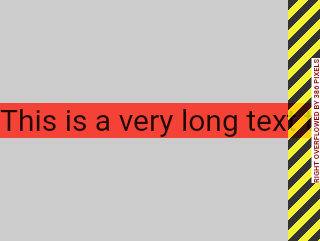
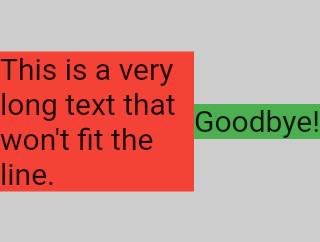
例 24
Row(
  children: [
    Container(
      color: red,
      child: const Text(
        'This is a very long text that '
        'won\'t fit the line.',
        style: big,
      ),
    ),
    Container(color: green, child: const Text('Goodbye!', style: big)),
  ],
)以来Row子に制約を課すことはありません。
子供たちが大きすぎて入らない可能性が十分にあります
利用可能な幅Row。この場合、ちょうどUnconstrainedBox、Row「オーバーフロー警告」が表示されます。
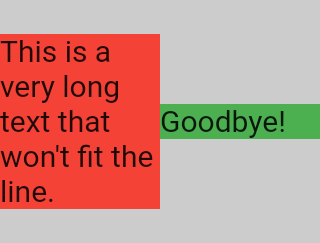
例 25
Row(
  children: [
    Expanded(
      child: Center(
        child: Container(
          color: red,
          child: const Text(
            'This is a very long text that won\'t fit the line.',
            style: big,
          ),
        ),
      ),
    ),
    Container(color: green, child: const Text('Goodbye!', style: big)),
  ],
)ときRowの子供は、Expandedウィジェット、
のRowこの子には独自の幅を定義させなくなります。
代わりに、以下を定義します。Expanded幅に応じて
他の子供たち、そしてそのときだけExpandedウィジェットの力
産まれる元の子供はExpandedの幅。
つまり、一度使用すると、Expanded、
元の子の幅は無関係になり、無視されます。
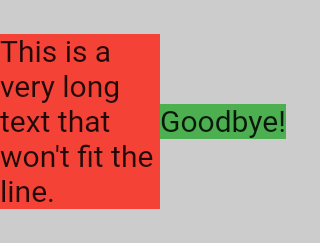
例 26
Row(
  children: [
    Expanded(
      child: Container(
        color: red,
        child: const Text(
          'This is a very long text that won\'t fit the line.',
          style: big,
        ),
      ),
    ),
    Expanded(
      child: Container(
        color: green,
        child: const Text(
          'Goodbye!',
          style: big,
        ),
      ),
    ),
  ],
)すべての場合Rowの子供たちは包まれていますExpandedウィジェット、
各Expandedサイズは flex パラメータに比例します。
そしてそのときだけそれぞれExpandedウィジェットはその子に強制的に持たせます
のExpandedの幅。
言い換えると、Expandedの優先幅を無視します
その子供たち。
例 27
Row(
  children: [
    Flexible(
      child: Container(
        color: red,
        child: const Text(
          'This is a very long text that won\'t fit the line.',
          style: big,
        ),
      ),
    ),
    Flexible(
      child: Container(
        color: green,
        child: const Text(
          'Goodbye!',
          style: big,
        ),
      ),
    ),
  ],
)使用する場合の唯一の違いは、Flexibleそれ以外のExpanded、
それは?Flexibleその子に同じかそれより小さいものを持たせる
幅よりもFlexibleそれ自体、一方でExpanded力
その子の幅は、Expanded。
でも両方ともExpandedとFlexible子供の幅を無視する
自分自身のサイズを測るとき。
例 28
Scaffold(
  body: Container(
    color: blue,
    child: const Column(
      children: [
        Text('Hello!'),
        Text('Goodbye!'),
      ],
    ),
  ),
)画面は強制的にScaffold全く同じ大きさになるように
画面と同様に、Scaffold画面いっぱいに表示されます。
のScaffoldと言うContainer必要なサイズにできるということ、
ただし画面より大きくはありません。
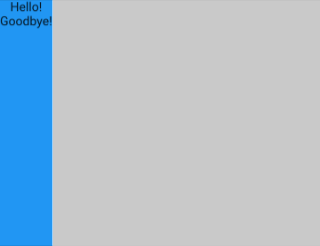
例 29
Scaffold(
  body: SizedBox.expand(
    child: Container(
      color: blue,
      child: const Column(
        children: [
          Text('Hello!'),
          Text('Goodbye!'),
        ],
      ),
    ),
  ),
)ご希望の場合は、Scaffoldの子供がまったく同じサイズであること
としてScaffoldそれ自体を、その子をラップすることができますSizedBox.expand。
厳しい制約と緩い制約
何らかの制約があるということをよく耳にします。 「きつい」または「緩い」ので、それが何を意味するのかを知っておく価値があります。
あきつい制約は 1 つの可能性を提供します。 正確なサイズ。言い換えれば、厳しい制約 最大幅は最小幅と同じです。 最大高さは最小高さと同じです。
flutterズに行くならbox.dartファイルして検索する
のBoxConstraintsコンストラクターを見つけると、
続く:
BoxConstraints.tight(Size size)
   : minWidth = size.width,
     maxWidth = size.width,
     minHeight = size.height,
     maxHeight = size.height;
再訪したら例 2その上、
画面が赤色を強制していることを示していますContainer画面とまったく同じサイズになるようにします。
もちろん、スクリーンはしっかりと通過することでそれを行います
に対する制約Container。
あゆるい一方、制約は、 を設定します最大幅と高さですが、ウィジェットを許可します 必要なだけ小さくなります。言い換えると、 緩い制約には最小幅と高さ どちらも等しいゼロ:
BoxConstraints.loose(Size size)
   : minWidth = 0.0,
     maxWidth = size.width,
     minHeight = 0.0,
     maxHeight = size.height;
再訪したら例 3、それは、Center赤にしましょうContainerもっと小さくなって、
ただし画面より大きくはありません。のCenterそうしますと、
もちろん、緩やかな制約を渡すことで、Container。
最終的には、Centerのまさに目的は変革することです
親から与えられた厳しい制約
(画面)その子の制約を緩める
(Container)。
特定のウィジェットのレイアウト ルールを学ぶ
一般的なレイアウト ルールを知ることは必要ですが、それだけでは十分ではありません。
各ウィジェットには一般的なルールを適用する際に多くの自由があります。 したがって、読んだだけではそれが何をするのかを知る方法はありません ウィジェットの名前。
推測しようとすると、おそらく間違った推測をするでしょう。 ウィジェットがどのように動作するかを正確に知ることはできません。 ドキュメントを読んだり、ソースコードを調べたりしたことがあります。
レイアウトのソースコードは通常複雑ですが、 したがって、ドキュメントを読むだけのほうがよいでしょう。 ただし、レイアウトのソースコードを研究することにした場合は、 ナビゲーション機能を使用すると簡単に見つけることができます IDE の。
以下に例を示します。
-
を見つける
Columnコード内でその場所に移動します ソースコード。これを行うには、次を使用しますcommand+B(マックOS) またcontrol+B(Windows/Linux) Android Studio または IntelliJ で。 に連れて行かれますbasic.dartファイル。 以来Column伸びるFlexに移動します。Flexソースコード (basic.dart)。 -
というメソッドが見つかるまで下にスクロールします。
createRenderObject()。ご覧のように、 このメソッドは、RenderFlex。 これは、Column。 次に、次のソースコードに移動します。RenderFlex、 それはあなたをflex.dartファイル。 -
というメソッドが見つかるまで下にスクロールします。
performLayout()。これが行う方法です のレイアウトColumn。

マルセロ・グラスバーグによる記事
マルセロは最初にこのコンテンツを次のように公開しましたFlutter: 初心者でも知っておくべき高度なレイアウト ルールミディアムで。私たちはそれがとても気に入ったので、出版を許可してくれるようにお願いしました docs.flutter.dev で、彼は快く同意してくれました。ありがとう、マルセロ! マルセロは次のサイトで見つけることができますGitHubとパブ.dev。
また、おかげでサイモン・ライトフットを作成するための 記事上部のヘッダー画像。